Setting up a console
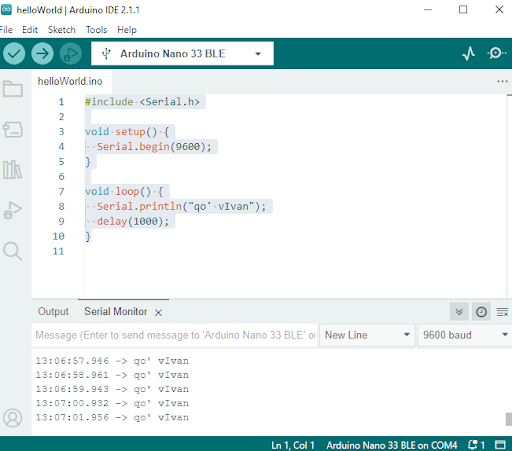
You can do a lot of debugging with just an LED, but many things become easier if your program can print things for the developer to see. Y’know, hello world. The Arduino universe makes sure that this code is pretty easy to write, program, and see the output of:
#include <Serial.h>

void setup() {
  Serial.begin(9600);
}

void loop() {
  Serial.println("qo' vIvan");
  delay(1000);
}

The IDE has a built in serial monitor, so this is all quite straightforward to do. There are a lot of things happening under the hood, but as long as they happen correctly, we neither know nor care.
In Zephyr, more of the complexity is exposed to the developer. The function call is printk(), but we need to ensure a console module is configured, connected to some type of transport, set up, etc. For Nordic’s dev boards, this is taken care of by default. For an Arduino Nano 33 on nRF, we have to take a bit of care. The zephyr/samples/subsys/usb/console sample (gh link) works out of the box, and uses the USB for console logging. This lovely blog post goes through some of the details, and the Nordic DevAcademy course covers setup and features.

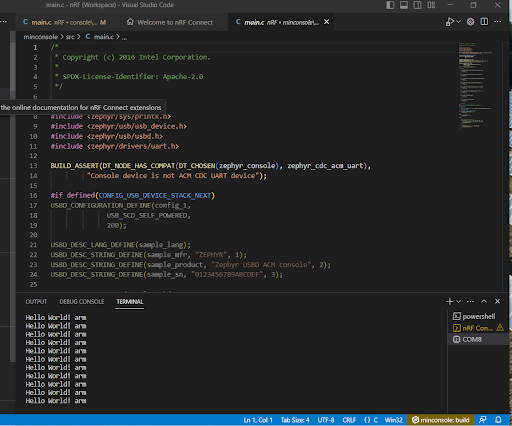
VSCode, with the nRF Connect extension, also has a serial terminal built-in. So this also works. Let’s look at the code in the sample, so we can see what we need to add to our applications so we can use console logging.
First, prj.conf:
CONFIG_USB_DEVICE_STACK=y
CONFIG_USB_DEVICE_PRODUCT="Zephyr USB console sample"
CONFIG_USB_DEVICE_PID=0x0004
CONFIG_USB_DEVICE_INITIALIZE_AT_BOOT=n

CONFIG_SERIAL=y
CONFIG_CONSOLE=y
CONFIG_UART_CONSOLE=y
CONFIG_UART_LINE_CTRL=y
We’re going to be using USB, so a bunch of stuff about that. We need the serial module, since that’s what the console will be talking to. We need the console module, of course, and we tell console it’ll be talking serial. The whole idea is console over USB serial, so there are three separate systems required (console, USB, serial).
There’s actually another USB device stack the sample is setup to support (USB_DEVICE_STACK_NEXT), but for simplicity I’ll ignore it.
Next, app.overlay adds needed nodes to the devicetree:
/ {
	chosen {
		zephyr,console = &cdc_acm_uart0;
	};
};

&zephyr_udc0 {
	cdc_acm_uart0: cdc_acm_uart0 {
		compatible = "zephyr,cdc-acm-uart";
	};
};
The chosen node tells the console it should be using the CDC ACM UART0 interface, and the other node is enabling that interface (I think).
Finally, main.c:
#include <zephyr/kernel.h>
#include <zephyr/sys/printk.h>
#include <zephyr/usb/usb_device.h>
#include <zephyr/drivers/uart.h>

BUILD_ASSERT(DT_NODE_HAS_COMPAT(DT_CHOSEN(zephyr_console), zephyr_cdc_acm_uart),
	     "Console device is not ACM CDC UART device");

int main(void)
{
	const struct device *const dev = DEVICE_DT_GET(DT_CHOSEN(zephyr_console));
	uint32_t dtr = 0;

	if (usb_enable(NULL)) {
		return 0;
	}

	/* Poll if the DTR flag was set */
	while (!dtr) {
		uart_line_ctrl_get(dev, UART_LINE_CTRL_DTR, &dtr);
		/* Give CPU resources to low priority threads. */
		k_sleep(K_MSEC(100));
	}
	int i = 0;
	while (1) {
		printk("Hello World! %i\n", ++i);
		k_sleep(K_SECONDS(1));
	}
}
The build assertion checks that you have the device tree set up as expectted. Then USB gets enabled, the program waits for the user to actually get a terminal connected, then starts using the console.